Showing posts with label master grade. Show all posts

Saturday, 7 July 2012

Full Armor Gundam Heavyarms Igel WIP Part 2

After a 2 months break,i finally back...It seems like every time i finish a project,i'll fall into a slump.But i feel that those breaks make gunpla enjoyable for me again,thus i am able to work faster and enjoy myself at the same time.


I probably became rusty after the break because the first thing i did was to cut up a wrong part.Luckily,I was able to salvage it,or else i might have to buy another set of full armor unicorn!I hope the project will be smooth sailing after this.

There are 3 modification i'm doing right now.Firstly there is this "tri-gatling gun" i'm making,nothing special just combining the gatling guns from unicorn to match the OVA version of Gundam heavyarms.

Secondly,i modified the unicorn back pack attachment to fit the back of heavyarms.A simple 2 pin mod,but it took me quit some time because of the mishap i mentioned just now.

Lastly,the biggest hurdle that i think for this project,scratch building the feet attachments.For now i'm just building the base of it,and will add details when this is done.I'm actually quite worried about this,but i still have to give it a try.

For the diorama,i've thought of making a mountain slope.Since i got some experience of making mountainous terrain from making the diorama for epyon.Unfortunately,it failed but it was still good experience.

I think thats it for this week,next week i'll be continuing the feet attachments and gatling gun mod.Also i will start making the diorama so please stay tune.Cheers!

Thursday, 12 April 2012

Gundam Epyon Ver. S.X.2,Wyvert Basilisk


Over 4 months in the making,and i have finally completed the gundam epyon.It was a tough and long journey,without the people who have supported me along the way,I may not have been able to finish this.So I really want to give my thanks to them,to those who have motivated me and kept me going.Thank you!


It was a big project,bigger than my last one,more mods and more parts.I originally wanted to enter this into a competition last year together with my deathscythe hell,but there wasn't enough time.Anyway,let me present Gundam Epyon Ver S.X.2,Wyvert Basilisk.


Also feel free to check out my blog for work in progress posts of this model. http://sx2gundam.blogspot.com/2011/08/mg-gundam-epyon-5-headed-dragon-wip.html

There have been so many times when i wanted to stop this project.There were just too many ideas for this and i didn't have the time to execute them properly.

I will still be making a diorama and continuing the wip for this in the near future but instead of pantheon diorama,i think a volcano diorama will suit this model better.

For my next project,the most important thing is not to rush,i tend to rush things and make mistakes and get demoralise,so it's really crucial to give myself ample time to get everything right.I will be making MG gundam heavyarms next,and i will emphasize on kit bushing and pla plate scratch building.It should be an interesting build for me and i hope i can make it into an impressive model...

Check out my new project's wip,full armor gundam heavyarms igel.I will be using parts from full armor unicorn gundam and scratchbuilding gundam heavyarms igel's parts,so it should be an exciting build!And here is the WIP for it, http://sx2gundam.blogspot.com/2012/04/full-armor-gundam-heavyarms-igel-wip.html Cya there!

Monday, 9 April 2012

Full Armor Gundam Heavyarms Igel WIP Part 1

Hello guys,i have recently started this new project and I will be working on MG Gundam Heavyarms.I think that modeling is all about learning,so for every new project,i will try to do something that i have not done before.For example,i started scratchbuilding using expoxy on Gundam Deathscythe Hell and kit bashing on Gundam Epyon.And this time,i will try to scratchbuild using pla plate which i have been very eager to try,but lack the confidence to do so.


For this project,it was a tough choice between Gundam Heavyarms and Gundam Sandrock.Gundam sandrock have a lot of potential.But on the other hand,Gundam Heavyarms is such an awesome kit that i can't think of what else i can add.Gundam Heavyarms is all about fire power,so i have decided to add more weapons and ammunitions to it.So i'm going to scratchbuild parts from Gundam Heavyaarms Igel and take the weapons from Full Armor Gundam Unicorn to make this into a killing machine.

These 2 kits is a seam line nightmare!There are so many seam lines and they are mostly on small parts and weapons,which makes them even harder to sand.

I'm going to use the parts from the loto set to make it into something like the attachments to the feet of Heavyarms Igel.The purpose of building this is also to stabilize the kit if the back pack gets too heavy with the addition of weapons.
 Gundam Heavyarms Igel


I will also mod the gatling guns from Gundam Unicorn to look more like the ones from Heavyarms Custom.I hope it will look like a MG version of those NG gatling guns.

I know this idea lacks originality,but what i want to emphasize on other than scratchbuilding is detailing,making the model look more like a machine using pla plate,panel lines,etc.I have always been envious of people who can make the model look so mechanical.Thus i will take this opportunity to further explore this technique,and hope that i can put it into good use and make better models in the future.

Lastly,I hope the people who have supported me through my Epyon project will continue to support me.Thank you!

Oh,and if there is anyone who is  wondering about Gundam Eypon.There were some problems when i was assembling it so i'm still trying to fix them.But don't worry,photos should be up this week.Cheers!

Sunday, 18 March 2012

MG Gundam Epyon "The Hydra" SNEAK PEEK

Let me start off by saying sorry to those who were patiently waiting for the update,that never came...I thought i will have enough new content for 1 last update before the completion of this kit,but i was wrong.I couldn't show you guys the dragon head like i said i would,because of time.i didn't want to hold up the progress of other parts,so i went to paint the front portion of the head which doesn't need detailing first.And after that i went to mask that part up,so that i can work on the back portion of the head.So when i was finished with the detailing,i didn't take any photos of it because of the ugly maskings.


So to make up for that,I took some photos after applying the decals and panel lines.Now all thats left to do is to spray a layer of clear flat on them and do some final touches,and the model will be done.The only thing i'm worried about is the weather here,it has been raining almost everyday which makes spraying those clear coats tough...Hope you guys are looking forward to this,i should be able to finish this soon.Cheers!

Oh ya,for the name,i was thinking of "Lermaean,the Indestructible".What do you guys think?

Sunday, 19 February 2012

MG Gundam Epyon "The Hydra" WIP Part 10

For this 2 week,i was planning to finish everything and get all the remaining parts set for painting.It was very rush,but i was able to finish most of the parts and prime them.So i will be able to start painting them next week.I also found the waterslides for this,which i have been looking for a long time.This is great news because if i wasn't able to find this,i will have to stop work after painting and wait for samual decal or bandai to come out with it.
 Active mode
Non-active mode

I know you guys are eager to know what i have added to the NG Nataku's claw.So lets start off with the beam cannon that i got from some zoids parts.The inner part of the claw was very empty,since there isn't a frame so i wanted to put something in it.I don't really have the time nor the skills to build a frame so i thought of adding a cannon.I attached 2 joints to the cannon,1 for it to be attached to the head and the other is for the neck(Epyon's whip) to attach to it.


Next,i have 2 scratched build thrusters/vents that i placed on the back of the head.I couldn't find suitable thrusters from my collection of gundam parts,so i have to try scratch building them.Luckily it turned out ok,i was worried because i don't have much confidence in my scratch building skills.


Thrusters still need some more work.

I also noticed that the head have a lot of crave areas which i don't really like,so i sanded them flat and give them some edges.I can't really explained why i don't like them but it just look "toyish"to me,but this is just my own personal opinion.I also went to sharpened the claw to make them look more menacing.

I really like the whip parts but it's a challenge to fix them.I have to find a way to separate the "round things" on the sides,so that i can have them painted different colors.I know i can mask them,but round parts are hard to mask.If the sides are even,i can still use blue tack to cover them for painting but its uneven.Luckily,i found an article showing how to do this and that is to cut them out before cementing and put them back after painting.


Nothing much to talk about the wing,its always the same process of puttying and sanding.However,i'm very happy and excited to finally have it ready for painting.

I think i have covered all the stuff i did over the past 2 week.I still need to do some detailing to the head,so i will probably have a short update when that is done next week.I hope you guys liked the overall look of the backpack and thank you for reading.Cheers!

Sunday, 5 February 2012

Gundam Epyon "The Hydra" Part 9

After a long break,i'm finally back!I'm so sorry for the long wait,but I definitely needed the break,it not only helped me recharged my "thinking cap" but also my motivation.I feel more refreshed now and ideas just keeps flowing into my head.

I know you guys want to know what i have done this week,so lets get right down to business.I have only started working on epyon after the completion of my MG Kampfer,so a lot of the stuff are still the same as before.The main body is almost done,just the painting of the frame and some parts are left.And now im focusing on the 2 main mods that still needs to be done which are the wing and the backpack.

For the wing,i have added some pla plates which i was having a hard time with before the break because i couldn't think of any designs for them.


A major change that I've made is with the 5th dragon head.I'm now planning to use the claw from 1/100 gundam nataku instead of the head i have "sculpted".I've been thinking,the dragon head may look nice but its just too impractical to a gundam.Gundams are weapons and if i cant make the dragon head into a practical weapon,then what is the point of adding it?However i do need a fifth head so i thought of using the claw from nataku which also looks like a dragon head,and its also a suitable weapon.I just need to make some changes so that it would suit a MG model.


There are several mods that i have made,extending and sharpening the fangs to make it look fiercer.And shortening the length of the claw to fit the backpack.Lastly,i did some mods to the joints for the fangs and the head so that i can paint them separately after cementing.For next week,i will try to make something to replace the white fin,which i don't like.And put a ball joint under the head so that i can join it with the neck.

The mods on the backpack are mostly done,the one thing that is giving me a headache is that i still find a suitable joint for the neck and backpack.I have tried using a pipe,but it looks too plain...Maybe you guys can give me some ideas?

I'm using bluetack for this.Haha:)

Thats all for now,I hope you guys are still excited of this build,and i'm really sorry for the long wait.

Monday, 30 January 2012

MG Kampfer(Completed)


I have finally finished the MG Kampfer for the "Universal Century vs Alternate Universe" group build on Gundam Eclipse forum and i'm so glad that i managed to finish it before the dateline.MG Kampfer is an awesome kit,the design looks cool and it has tons of weapons.My only problem was its frame,since it uses an older frame design some of the joints weren't very strong which make posing it a challenge. My original concept for this model is to make it into a machine that have gone through many battles,however i wasn't able to completely stick to that idea.

I've made 2 mistakes during the work process,the first mistake lies with the damages i've added.It wasn't enough nor sever enough to give the impression of a war machine.Aside from adding more big slash marks,burn holes and bullet holes,i also should have added some cast iron effect on the kit.

Secondly,i've overlooked the importance of "washing" during the weathering process.The washing technique is very crucial if you want a nice weathered kit,because if done correctly it helps to show the age of the machine,by introducing rust and other weather elements to the kit,just like a real old machine would have.I skipped this step because to prepare for the washing process,another clear coat must be added after panel lining to seal the panel lines.However,the weather was bad and i couldn't spray that layer of clear coat in time.I thought i can achieve the same effect by using pastel but i was wrong,it was really a shame.

Although i wished that i could have avoided these mistakes,i am still very proud of this.Everytime i finish a kit,i always get this "wow" feeling,i'm sure some or all of you will understand this.Maybe its because of the effort i've put into the kits or maybe its just how different the kit look after it has been painted.I hope you guys like this kit as much as i do and i can't wait to get back to my Epyon gundam.Cheers:)


Monday, 23 January 2012

WIP MG Kampfer Part 2(Painting)

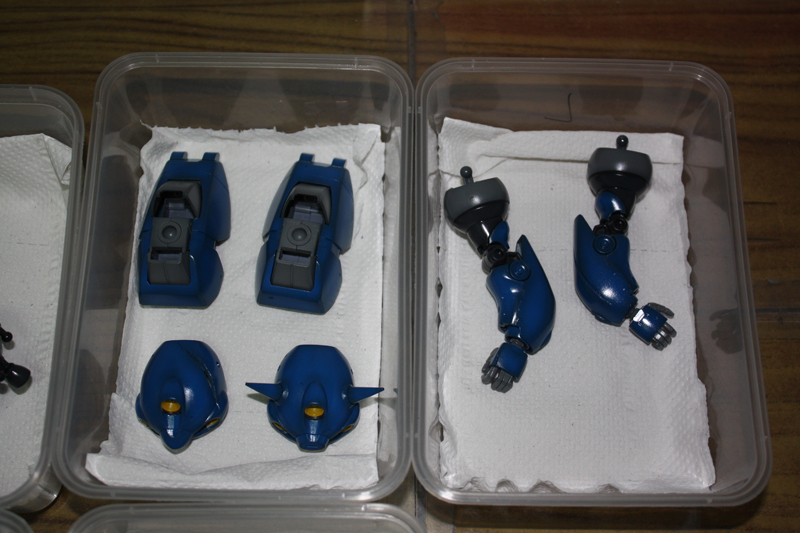
I took 2 weeks to finish up the paintings and glossing the parts.I didn't expect this to take up 2 whole weeks,so i'm a little behind time.I will do my best to finish up the washing and panel lining this week,and finish up the whole thing by next week.
Nothing much to say about the color choice but i did try a heavier shading on this kit.And with proper weathering,i hope it will turn out the way i want it to.Here are some photos of the parts....